op_inst_16button
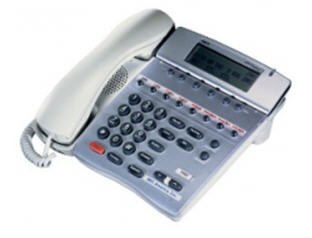
Operating instructions for NEC Series I
Terms
- PRIME LINE - The PRIME LINE refers to your telephone's number. Your PRIME LINE is the upper left hand button on your telephone.
- OFF HOOK - OFF HOOK means you lift the handset and get a dial tone. A green light will appear indicating a line is in use.
- FLASH - FLASH is a programmed button that signals the telephone switch that you are using a feature, such as CALL BACK, MESSAGE, or VOICE.
- * AND # - The * (star) and # (pound) buttons on the keypad are used with certain numbers for accessing features.
- ACCESS CODE - An ACCESS CODE is a two-button code that lets you use certain features on the telephone, such as CALL FORWARD (*+7).
- HUNT GROUP - A HUNT GROUP allows a call to be directed to an idle station in a prearranged group when the called station is busy.
- PICK-UP GROUP - This feature allows you to answer calls directed to other telephones in a programmed group by simply dialing an access code or pressing a PICK button.
- TIE LINES - A telephone line which connects you to the V.A. Hospital, University Hospital, or University Health Center - Downtown by dialing a tie line access code and a four- or five- digit extension number (94+XXXX or 98+XXXXX).
Rings
- SELECTING RING SOUNDS - With a code you can select the sound of the ring. While your telephone is ringing:
- Press FNC+3. Your Display shows, "RINGER TONE and the number of that tone (1,2,3,4)."
- Continue pressing FNC+3 to hear all four tones.
- SELECTING THE TELEPHONE RING VOLUME - The ringer volume is controlled by the UP or DOWN arrow buttons located below the dedicated function buttons and keypad on the telephone. While your telephone is ringing, press either the UP or DOWN arrow button. The volume will change accordingly.
- NORMAL RING - The normal ringing sound indicates an incoming call from another telephone within the Health Science Center.
- FAST RING - The fast ringing sound indicates an incoming call from an off-campus telephone.
Tones
Each telephone has five different tones. You can hear the tones through the handset or speaker if you press the SPKR button on.
- DIAL TONE - DIAL TONE is the common, steady tone indicating you may make a call or use a feature.
- BUSY SIGNAL - The BUSY SIGNAL indicates you dialed a number that is being used.
- REORDER TONE - The REORDER TONE sounds like a fast busy signal. It means an unassigned number was dialed, a service feature was denied, or your handset was off hook too long.
- SPECIAL DIAL TONE - The SPECIAL DIAL TONE sounds like a pulsating busy signal. This means you may proceed to use a feature.
- SERVICE SET TONE - The SERVICE SET TONE is a high steady tone that tells you a feature was set or cancelled.
Display
At the top of the 16 button telephone there is a liquid crystal display (LCD) which assists you in using your telephone. If your telephone is idle, you will see the time, day of the week, and date. When your telephone is sending or receiving calls or features, the display will show what is happening. When you dial an extension number, for example, the display will show the extension number you called until you end the call. The display's contrast is adjusted by pressing either the UP or DOWN arrow button when the telephone is idle.
Dedicated keys
There are eight dedicated keys located on the bottom and right side of the keypad. They are explained in the following sub-paragraphs.
- HOLD (HOLD) - The red HOLD button allows you to put a call on hold.
- Press HOLD once and the other person hears music. The light under the line you are using will begin blinking green. Your display shows, "HLD and the extension number."
- To return to the call, lift your handset and press the button under the blinking green light on your telephone. Your display will show, "the extension number with which you are connected."
- If you press the HOLD button twice, your telephone is the only one that can retrieve the call, even if that line appears on other telephones. The call on hold will ring back in 2 minutes and 30 seconds. Your display will show, "EHD and the extension number."
- TRANSFERS (TRF) - There are three types of TRANSFERS: TRANSFER, CONSULTATION HOLD, and CALL PARK.
- TRANSFER The TRF button allows you to transfer a call to another telephone.
- Press TRF. You will hear the special dial tone.
- Dial the number where you want the call to go. Your display shows, "XFR and the extension number." You will hear a ring or busy signal.
- Announce the call. The caller is still on "hold" and cannot hear your conversation.
- After you announce the call, press RECALL and hang up. The callers are automatically connected.
- If the number you call is busy or there is no answer, press TRF to go back to the caller.
- CONSULTATION HOLD Allows you to place a call on hold, call someone else and go back to the first caller.
- Press TRF. You will hear the special dial tone.
- Dial the number you need. Your display shows, "XFR and the extension number." You may talk with the other person you called.
- Wait for the other person to hang up or press TRF again. You are automatically connected back to the first caller.
- CALL PARK Allows you to "park" a call until you retrieve it from your own or another telephone.
Example: I receive a call and must go to a file room to look up information. I "park" the call, get the information in the file room, and retrieve the "parked" call on the telephone in the file room. I can also retrieve the call on my telephone.
- Press TRF+*+0. Your display shows, "PRK SET and the number." You will hear the service set tone. Hang up.
- To retrieve the call at the original telephone, lift the handset and press *+ 0. You are automatically reconnected with your caller. Your display shows, "PRK and the number."
- To retrieve the call from another telephone, lift the handset and press #+0 and the extension number of the telephone where you "parked" the call. You are automatically reconnected with your caller. Your display shows, "PRK and the number."
- A "parked" call must be retrieved. If the call is not retrieved, it will ring back to the original extension in 2 minutes and 20 seconds.
- ANSWER (ANS) - If someone calls the main Health Science Center telephone number (567-7000) for you, the operator can "camp" the call on your line, (like call waiting on your home telephone). A short tone will tell you the call is "camped" on your busy line. Your display shows, "CMP." The ANS button light will flash. You must use the ANS button to retrieve this call.
- When you have a call in progress and you hear the "camped" on tone, press ANS.
- Your first caller is put on "hold." You may now talk to your second caller. You may also put the second caller on "hold" and return to the first caller by pressing ANS.
- After completing the second call, press ANS and you are connected back to your first caller.
- SPEAKER (SPKR) - Allows you to dial or monitor a call without lifting your handset. The SPKR light will be lit red. This telephone is a speakerphone. To use your telephone as a speakerphone:
- Press FNC+5. Your display shows, "HANDS FREE ON."
- Press FNC+1. Your MIC light must be lit red.
- To make a call, press SPKR (the red light shows the speaker is on). You may dial a number, talk, or monitor a call without lifting your handset.
- To hang up, press the SPKR button off. This shuts off the speaker capability and the red speaker light goes out.
- If you leave your SPKR button on and don't do anything, you will soon hear a reorder tone to alert you. If enough time passes, a loud sound will alert you.
- LAST NUMBER REDIAL/SPEED DIAL (LNR/SPD) - Allows your telephone to "remember" the last number you dialed.
- Leave your handset in its cradle and the SPKR button off.
- To call the last number dialed, press LNR/SPD. You will hear dial tone. Your display shows, "LNR[*]/SPD[__]."
- Press * and the number is automatically redialed.
- Use your speakerphone or lift the handset to talk.
- CONFERENCE (CNF) - The CNF button allows you to set up a three-party conversation. The three people may be either on or off campus.
- First, make or receive a call.
- Press TRF. You will hear the special dial tone. Your display shows, "XFR and the extension number."
- Then call the third party.
- When the third party answers, press CNF. Your display shows, "CONF." All three parties are automatically connected. The red CNF light will stay on until one person hangs up.
NOTE: If the conference call includes a long distance number, you must dial it first.
- FUNCTION (FNC) - The FNC button allows you to activate telephone setup functions and to program one-touch speed dial buttons.
- FNC+1 - Turns the built-in microphone on or off. The MIC light is red when it is on.
- FNC+2 - Adjusts the handset receiver volume. Continue to press FNC+2 until the volume meets your needs. Your display shows, "RCV VOL.SMALL" or "RCV VOL.LARGE."
- FNC+3 - Selects the tone of the ring.
- This telephone has four ring tones.
- While the telephone is ringing, press FNC+3 to change the ring tone. Continue to press FNC+3 for the other ring tones. Stop at the tone of your choice. Your display shows, "RINGER TONE and the number of the tone (1,2,3,4)."
- FNC+4 - Adjusts both the transmission and the receiver volume of the handset. Continue to press FNC+4 until the volume meets your or your caller's needs. Your display shows, "T/R VOL.SMALL" or "T/R VOL.LARGE."
- FNC+5 - Activates the speakerphone. Press FNC+5 and FNC+1 to use your telephone as a speakerphone. Your display shows, "HANDS FREE ON", and the MIC light must be lit red.
- FNC+6 - Deactivates the speakerphone. Press FNC+6 to deactivate the speakerphone. Your display shows, "HANDS FREE OFF."
- FNC+7 - Toggles on and off the red light located on the upper right corner of the telephone. This light indicates your telephone is ringing or a voice mail message is waiting. Your display shows, "INDICATOR ON" or "INDICATOR OFF."
- RECALL (RECALL) - The RECALL button is used to end a call and get a new dial tone.
- Press RECALL while your handset is out of its cradle or your SPKR is on.
- RECALL does not mean that you "re-call" another number. It is simply a quick way of getting a new dial tone.
Example: I want to call ext. 7-2061 and realize I dialed ext. 7-2161. By pressing RECALL, I automatically get a quick, new dial tone.
- SPEAKER/RECEIVER VOLUME - Allows you to control the speaker and receiver volume while using your telephone.
- To activate: While using the speakerphone or the handset to converse, press either the UP or DOWN arrow button to adjust the speaker and the receiver volume.
Programmed keys and features
On the 16 button telephone there are sixteen buttons (four rows of four). The upper left hand button is the "prime line" of your telephone. The other buttons are a combination of telephone numbers and programmed features.
- CALL FORWARD (FWD) - CALL FORWARD allows you to forward all calls to another telephone number.
- With programmed button (FWD)
- Lift your handset or press SPKR and press the FWD button. You will hear the special dial tone. Your display shows, "FWD."
- Dial the extension number where you want your calls sent. You will hear the service set tone. Your display shows, "FWD SET and the extension number." Hang up or press SPKR button off. Your display returns to time/day. The FWD button light reminds you that your calls are being forwarded. All calls will continue to be forwarded until you cancel this feature.
- To cancel, lift your handset or press SPKR and press the FWD button. You will hear the service set tone. Your display shows, "FWD CNCL." Hang up or press SPKR button off. Your display returns to time/day.
- With access code (*+7 and #+7)
- Lift your handset or press SPKR and press *+7. You will hear the special dial tone. Your display will show, "FWD."
- Dial the extension number where you want your calls sent. You will hear the service set tone. Your display shows, "FWD SET and the extension number." Hang up or press SPKR button off. Your display returns to time/day. All calls will continue to be forwarded until you cancel this feature.
- To cancel, lift your handset or press SPKR and press #+7. You will hear the service set tone. Your display shows, "FWD CNCL." Hang up or press SPKR button off. Your display returns to time/day.
- CALL FORWARD/BUSY/NO ANSWER (FWBNA) - CALL FORWARD/BUSY/NO ANSWER allows you to forward your calls to another telephone number when you are not there or if your line is busy.
- With programmed button (FWBNA)
- Lift your handset or press SPKR and press the FWBNA button. You will hear the special dial tone. Your display shows, "FWD."
- Dial the extension number where you want your calls sent. You will hear the service set tone. Your display shows, "FWD SET and the extension number." Hang up or press SPKR button off. Your display returns to time/day. The FWBNA button light reminds you that your calls are being forwarded. Your calls will continue to be forwarded until you cancel this feature.
- To cancel, lift your handset or press SPKR and press the FWBNA button. You will hear the service set tone. Your display shows, "FWD CNCL." Hang up or press SPKR button off. Your display returns to time/day.
- With access code (*+8 and #+8)
- Lift your handset or press SPKR and press *+8. You will hear the special dial tone. Your display shows, "FWD."
- Dial the extension number where you want your calls sent. You will hear the service set tone. Your display shows, "FWD SET and the extension number." Hang up or press SPKR button off. Your display returns to time/day. Your calls will continue to be forwarded until you cancel this feature.
- To cancel, lift your handset or press SPKR and press #+8. You will hear the service set tone. Your display shows, "FWD CNCL." Hang up or press SPKR button off. Your display returns to time/day.
- CALL PICK-UP (PICK) - PICK allows you to answer up to twenty numbers that are physically close together. You can answer a telephone that is in your Pick-Up Group and does not show as a line on your telephone. You must be able to hear the telephone ring.
- With programmed button (PICK)
- Lift your handset or press SPKR and press the PICK button to answer another ringing telephone within your Pick-Up Group. Your display shows, "PCK and the extension number." You are automatically connected to the caller.
- With access code (*+6)
- Lift your handset or press SPKR and press *+6 to answer another ringing telephone within your Pick-Up Group. Your display shows, "PCK and the extension number." You are automatically connected with the caller.
- DIRECTED CALL PICK-UP - This feature allows you to answer another ringing telephone that is not in your Pick-Up Group.
Example: You are in the office next door and you hear your telephone ring. To answer your call use DIRECTED CALL PICK-UP:
- Lift your handset or press SPKR and press #+6. You will hear the regular dial tone. Your display shows, "PCK."
- Then dial the extension number of the ringing telephone. Your display shows, "PCK and the extension number." You are automatically connected to the caller.
- VOICE CALL (VOICE) - This feature allows you to speak directly through the handset of your 16 button telephone to another 8 or 16 button telephone. It is a one-way intercom.
- With programmed button (VOICE)
- Lift your handset and dial the extension. Your display shows the extension number.
- Then press the VOICE button. Your display now also shows, "VCL." Four to five "pings" will be heard on the telephone being called.
- The person you are calling must have the MIC button on to speak to you without lifting the handset. The handset may be used at anytime.
- With access code (FLASH+*+3)
- Lift your handset and dial the extension. Your display shows the extension number.
- Then press FLASH+*+3. Your display now also shows, "VCL." Four to five "pings" will be heard on the telephone being called.
- The person you are calling must have the MIC button on to speak to you without lifting the handset. The handset may be used at anytime.
- BOSS/SECRETARY - This feature allows a secretary to screen calls.
- Press the boss's ringing line and answer the incoming call. This is the boss's prime line which is programmed to ring on your phone.
- Press the boss's line again to put the caller on hold and to send a voice call to your boss's prime line number. Four to five "pings" will alert the boss of the voice call. Announce the call through your handset. Your boss may respond by speakerphone if the MIC button is on, or by lifting the handset to tell you what to do with the call. Your display shows, "MIC and your boss' extension number" when the handset is lifted.
- If your boss wants to take the call, you hang up. The boss then presses his or her own prime line button, lifts the handset, and speaks with the caller. You may return to the caller by pressing the boss's line again to take a message.
- SAVE AND REPEAT (S&R) - This feature allows you to save a number and redial it even if intervening calls have taken place on your telephone.
- Press S&R while you are listening to a telephone ring, get a busy signal, or talking to someone you need to call back. Your display shows, "S&R and the number you are calling." The light serves as a reminder that you have a number stored in S&R.
- When you are ready to call them again, lift your handset or press SPKR and press S&R. The call is automatically dialed. Your display will show the number you are calling.
- SPEED DIAL (SPD) - This feature allows you to call a number you have preprogrammed in a SPD button. This SPD button may be programmed as one of the 16 programmable buttons on the top of the telephone. Each SPD button will hold up to 8 digits.
- To program a SPD button
- Leave the handset in its cradle and the SPKR button off.
- Press the FNC button, then press the desired SPD button.
- Enter the desired telephone number. The number shows in your display.
- Press the FNC button again to store the number in the desired SPD button. Your display shows, "SPD SET."
- To use a SPD button
- Leave your handset in its cradle and the SPKR button off.
- Press the desired SPD button you programmed. The telephone number is automatically dialed. You will hear ringing or a busy signal. Your display shows the time, date, and the number you are calling.
- Use your speakerphone or lift the handset to talk.
- SPEED CALLING - The 16 button telephone has twenty SPEED CALLING buttons you can program for one-touch calling. These buttons are located on the right side of the telephone. Each button will hold up to a 24 digit number. Do not confuse this with the SPD buttons which only hold 8 digits.
- To program SPEED CALLING buttons
- Leave your handset in its cradle and the SPKR button off.
- Press the FNC button, then press the desired SPEED CALLING button.
- Enter the desired telephone number. Your display shows, "the digits you entered into a SPEED CALLING button."
- Press the FNC button again to store the number in the desired SPEED CALLING button. Your display shows, "SPD SET."
- To use SPEED CALLING Buttons
- Leave your handset in its cradle and the SPKR button off.
- Press the SPEED CALLING button you programmed. The telephone number is automatically dialed. You will hear ringing or a busy signal. Your display shows, "the time, date, and the number you are calling."
- Use your speakerphone or lift the handset to talk.
- PAGE - The PAGE button allows you to establish twenty additional SPEED CALLING buttons for a total of forty. By pressing the PAGE button you are turning the page to 20 extra unused SPEED CALLING buttons. Each SPEED CALLING button will hold up to a 24-digit number.
- To program PAGE SPEED CALLING buttons
- Leave your handset in its cradle and the SPKR button off.
- Press the PAGE button. The PAGE light will be lit red.
- Press FNC+SPEED CALLING button and enter the desired telephone number. Your display shows, "the digits you entered into a SPEED CALLING button."
- Press the FNC button again to store the number in the desired secondary SPEED CALLING button. Your display shows, "SPD SET."
- To use PAGE SPEED CALLING buttons
- Leave your handset in its cradle and the SPKR button off. The PAGE light must be lit red.
- Press the SPEED CALLING button you programmed. The telephone number is automatically dialed. You will hear ringing or a busy signal. Your display shows, "the time, date, and the number you are calling."
- Use your speakerphone or lift the handset to talk.
- CALL BACK (CB) - The CALL BACK feature allows you to have a busy extension call you back when both extensions are idle. If you call and receive a busy signal, you can set a CALL BACK. When the busy extension hangs up, your telephone will ring. When you lift your handset, their telephone will ring. If you are not in when the busy extension hangs up, the ringing will stop after three to five rings and the other extension will not ring at all. You can place only one extension number in CALL BACK at a time.
- With programmed button (CB)
- When calling an extension number and you hear a busy signal, press CB. You will hear the service set tone. Your display shows, "CB SET" and the CB light is on. Hang up.
- When the "busy" extension hangs up, the CALL BACK process begins. Your display will show, "CB and the extension number that is calling you." Your telephone will begin to ring.
- ) To cancel, lift your handset or press SPKR and press the CB button. The red indicator light will go off and you will hear the service set tone. Your display shows, "CB CNCL." The CALL BACK is cancelled.
- With access code (FLASH+*+9 and #+9)
- When calling an extension number and you hear a busy signal, press FLASH+*+9. You will hear the service set tone. Your display shows, "CB SET". Hang up.
- When the "busy" extension hangs up, the CALL BACK process begins. Your display will show, "CB and the extension number that is calling you." Your telephone will begin to ring.
- To cancel, lift your handset or press SPKR and press #+9. You will hear the service set tone. Your display shows, "CB CNCL." The CALL BACK is cancelled.
- DO NOT DISTURB (DND) - The DO NOT DISTURB feature allows you to turn your telephone off. Your callers will hear a reorder tone which indicates that your telephone is set in DND.
- Leave your handset in its cradle and the SPKR button off.
- Press the DND button. Your display shows, "DND SET" and the light will be lit red.
- To deactivate, leave your handset in its cradle and the SPKR button off. Press the DND button off. Your display shows, "DND CNCL" and the light will go out.
- MESSAGE (MSG) - The MESSAGE feature allows you to receive or leave a message on an 8 button telephone or on the display of another 16 button telephone.
NOTE: Up to four messages may be left on one 8 or 16 button telephone. If a fifth message is attempted, the telephone line will continue to ring and your display shows, "MSG BSY." If a telephone cannot receive messages, the telephone line will continue to ring and your display shows, "MSG RST."
- With programmed button (MSG)
- Lift the handset or press the SPKR button on.
- Dial the extension number. If you receive a busy or no answer, press the MSG button. You will hear the service set tone. Your display shows, "MSG SET and the extension number."
- Hang up or press the SPKR button off. The message was left on the telephone that you called. Your display returns to time/day.
- If you continue to hear ringing, and your display shows either "MSG BSY" or "MSG RST" it means you can't leave a message on the telephone you are calling.
- With access code (FLASH+*+4)
- Lift the handset or press the SPKR button on.
- Dial the extension number. If you receive a busy or no answer, press FLASH+*+4. You will hear the service set tone. Your display shows, "MSG SET and the extension number."
- Hang up or press the SPKR button off. The message was left on the telephone that you called. Your display returns to time/day.
- If you continue to hear ringing and your display shows either "MSG BSY" or "MSG RST" it means you can't leave a message on the telephone you are calling.
- To return the call
- To return a call when your message light is on, lift your handset or press SPKR button on. Then press the MSG button and the number showing on your display is automatically dialed.
Contact Information: For further information, please call IM Client Support Services at 7-2061.
Cost:
| EQUIPMENT |
INSTALLATION |
DISCONNECT |
MONTHLY CHARGE |
| |
|
|
|
Request Instructions: Please contact Information Client Support Services at ext. 7-2061 for further information or submit a SRF **(Service Request Form).